Aluminum is a fantastic material, but it has a reputation for being tricky to weld. It has a tough, invisible oxide layer that causes major issues, and it pulls heat away from your weld puddle incredibly fast. If you've ever tried and ended up with a messy, weak joint, you're not alone. The solution to these challenges is learning the art of TIG welding aluminum. The TIG process is uniquely suited to handle aluminum's quirks, using an alternating current to clean the metal while you weld and giving you precise heat control with a foot pedal. This article is your complete roadmap to overcoming the hurdles, showing you exactly how to prepare your metal and set up your machine to get clean, strong, and professional results every time.
Key Takeaways
- Prioritize a Two-Step Cleaning Process: Always begin by degreasing the aluminum with a solvent like acetone. Immediately after, use a dedicated stainless steel brush to scrub away the surface oxide layer, as this is the single most important step for preventing a weak, contaminated weld.
- Dial In Your AC Welder Settings: Aluminum requires an AC (Alternating Current) setting to break through its oxide layer. Use the AC balance to adjust the cleaning action and the AC frequency to focus the arc, giving you precise control over the final weld quality.
- Develop a Coordinated, Two-Handed Technique: Always push the torch forward while using your other hand to dab the filler rod into the leading edge of the puddle. Control your heat input with a foot pedal to manage the puddle size, and remember that consistent practice is the only way to build this essential muscle memory.
What is TIG Welding and Why Use It for Aluminum?
If you want to weld aluminum, TIG welding is one of the best methods you can learn. It gives you incredible control and produces clean, strong, and precise welds that look fantastic. This level of quality is exactly why it’s the go-to process for everything from aerospace parts to custom architectural elements. For homeowners, this precision is invaluable for projects involving aluminum, ensuring repairs and fabrications are both durable and professional-looking. Let's break down how it works and why it’s so well-suited for a tricky material like aluminum.
How TIG Welding Works
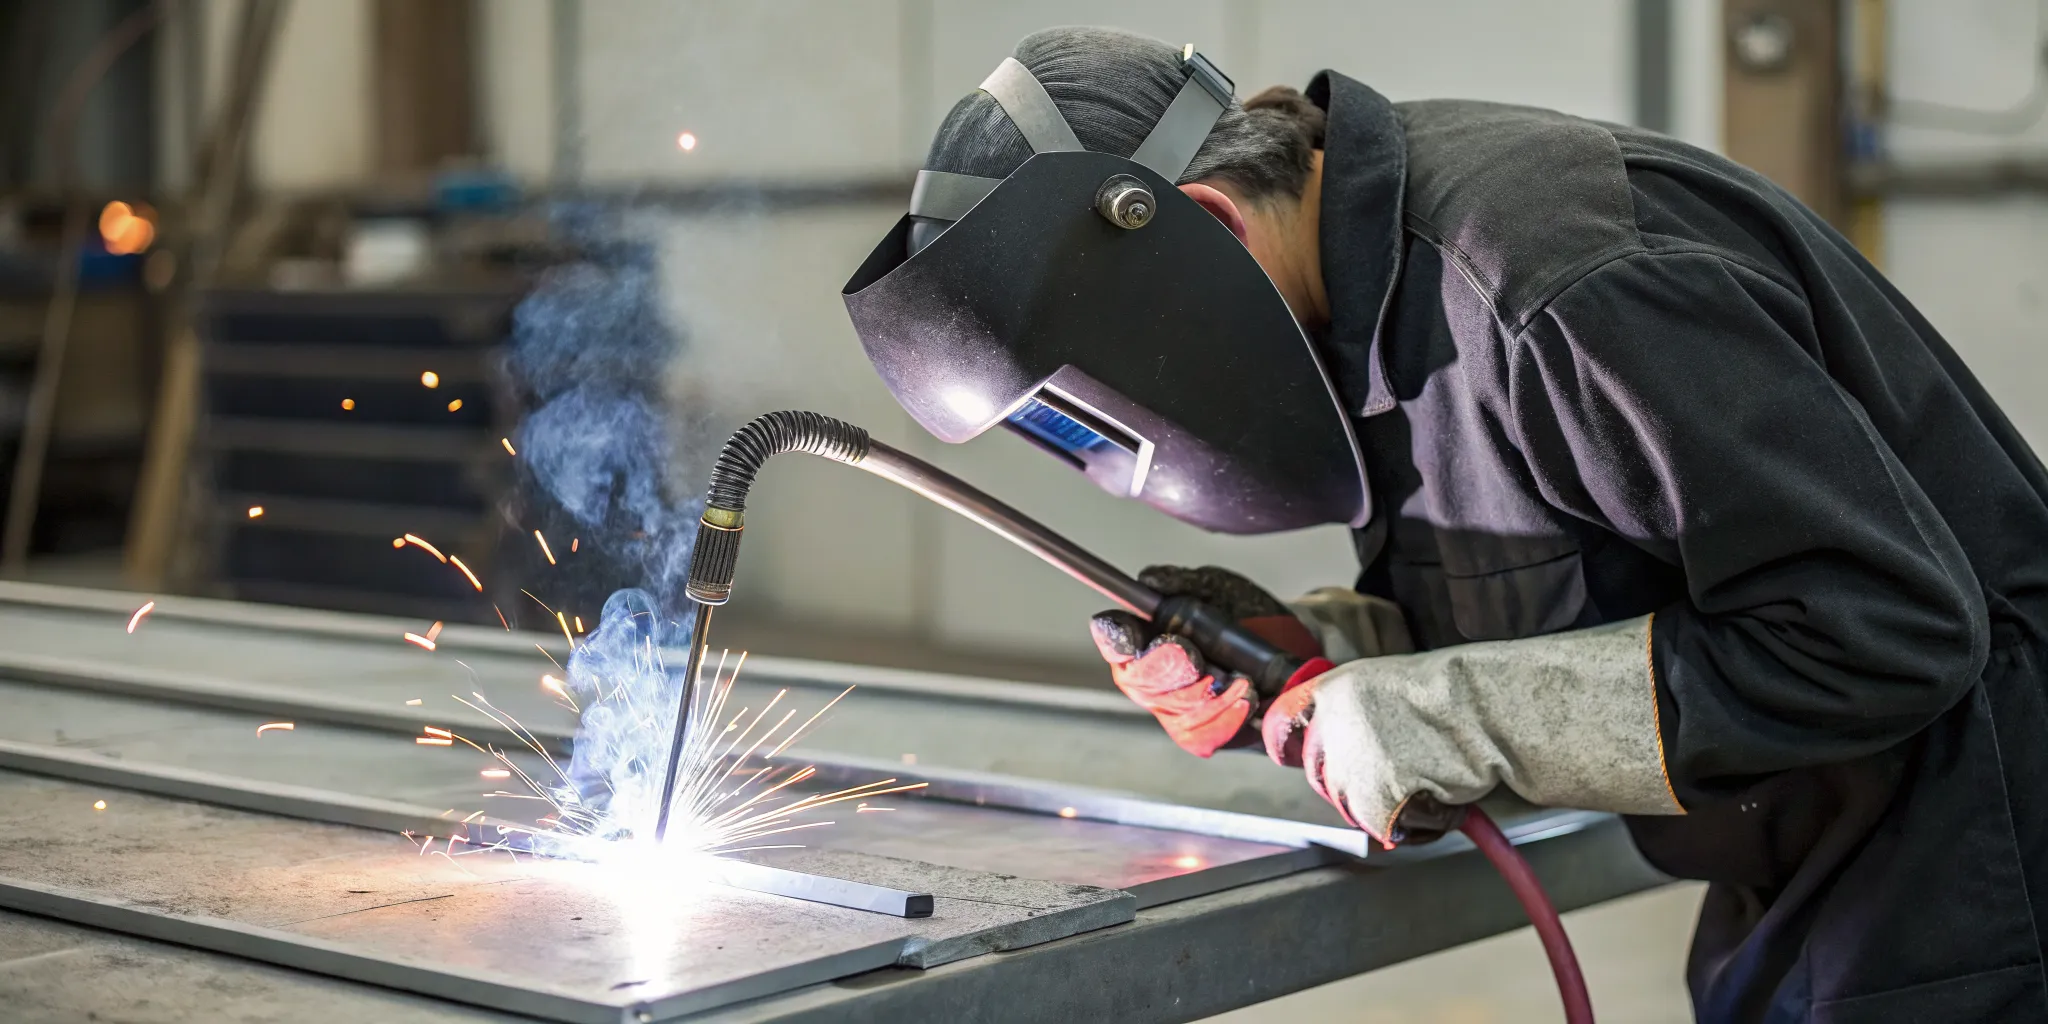
TIG stands for Tungsten Inert Gas welding. The process uses a non-consumable tungsten electrode to heat the metal you’re welding and an inert gas (usually argon) to protect the weld area from airborne contaminants. Unlike other methods, you feed a separate filler rod into the weld puddle with your other hand. This two-handed technique is what allows for such high-quality results, making it perfect for visible welds on custom parts, pipes, and even high-end metal roofing components where appearance is just as important as strength.
Why Aluminum Needs a Special Touch
Aluminum isn't like welding steel; it has a few quirks you need to understand. The biggest challenge is its oxide layer. This is a thin, tough coating that forms instantly on any exposed aluminum surface. The problem is, this oxide layer melts at a much higher temperature (around 3,700°F) than the aluminum underneath (around 1,220°F). If you aren't careful, you can end up melting the base metal while the oxide layer on top is still solid, which makes for a messy and weak weld. Effectively cleaning and breaking through this layer is the key to successfully welding aluminum.
TIG vs. MIG for Aluminum: What's the Difference?
When welding aluminum, the main debate is often between TIG and MIG. While MIG welding is faster, TIG welding offers far superior control and produces higher-quality welds. Think of it as writing with a fine-point pen (TIG) versus a thick marker (MIG). TIG welding machines give you features like AC Balance, which lets you adjust the cleaning action to remove the oxide layer, and AC Frequency, which focuses the arc for better precision. This control makes TIG the ideal choice for any project where the final look and structural integrity are critical, from custom fabrications to detailed repairs on remodeling and gutter systems.
Gather Your TIG Welding Gear
Alright, before you can lay down that perfect stack-of-dimes bead, you need to get your gear in order. Having the right tools and materials on hand makes the entire process smoother and safer. Think of it like cooking: you wouldn't start making a complex dish without prepping your ingredients first. Welding is no different. Getting your setup right from the start saves you a ton of frustration and helps you focus on building your skills. It ensures that when a weld doesn't turn out right, you can troubleshoot your technique instead of questioning your equipment. Let's walk through the essential equipment you'll need to TIG weld aluminum.
Your TIG Welder
First things first, you need a welder capable of TIG welding on an Alternating Current (AC) setting. This is non-negotiable for aluminum. The AC is essential because it has a cleaning action that breaks through the tough oxide layer that forms instantly on aluminum surfaces. A DC-only machine just won't cut it. The most common and effective setup involves an AC TIG welding power source paired with 100% argon shielding gas. While some multi-process machines offer AC TIG capabilities, a dedicated TIG welder will give you the most control and produce the best results as you're learning.
Tungsten Electrodes and How to Prep Them
Your tungsten electrode is what creates the arc. For welding aluminum on AC, your best bets are 2% Ceriated (usually gray) or 2% Lanthanated (often blue or gold) tungsten. These types handle the AC current well and are easier to start. Before you weld, you need to prep the tip. Unlike the sharp point you'd use for steel, for aluminum you want a slightly balled or rounded tip. You can achieve this by striking an arc on a piece of scrap copper or by setting your machine to AC and gently starting an arc. This rounded shape helps create a more stable and focused arc for clean, precise welds. A proper tungsten preparation is a small step that makes a huge difference.
Choose the Right Aluminum Filler Rod
The filler rod is the metal you add to the weld puddle to join the pieces together. For aluminum, the two most common choices are 4043 and 5356. As a beginner, you'll probably find 4043 a bit more user-friendly. It contains silicon, which helps it flow more smoothly and makes it more forgiving of a less-than-perfectly-clean surface. The 5356 rod, on the other hand, is a bit stiffer and creates a stronger weld, making it great for projects that need more structural integrity. When you're starting out, grab a pack of both and see which you prefer. Also, choose a filler rod size that feels comfortable to feed into the puddle without chilling it too much.
Shielding Gas and Gas Lenses
For TIG welding aluminum, you must use 100% Argon for your shielding gas. No exceptions or gas mixes here. The argon protects the molten weld puddle from oxygen and other contaminants in the air that would ruin your weld. To get the best possible gas coverage, I highly recommend using a gas lens in your TIG torch. A gas lens has screens inside that smooth out the flow of argon, creating a soft, stable blanket of gas over your weld. This improved coverage allows you to stick your tungsten out a bit farther for better visibility, and it’s a lifesaver when welding on joints that aren't perfectly flat.
Essential Safety Equipment
Even though TIG welding is known for being a clean process with minimal sparks, don't get complacent with safety. The arc is incredibly bright and produces intense ultraviolet (UV) rays that can cause serious burns. Always wear your personal protective equipment (PPE). This includes a good auto-darkening welding helmet, safety glasses underneath your helmet, a flame-resistant welding jacket, and proper TIG gloves that offer both protection and dexterity. TIG welding aluminum produces an ozone layer and fumes, so always work in a well-ventilated area. Your safety gear is the most important part of your setup, so don't ever skip it.
How to Prep Aluminum for a Perfect Weld
If there’s one secret to a strong, clean aluminum weld, it’s this: preparation is everything. Aluminum is notoriously picky and will not forgive a dirty or poorly prepped surface. Unlike steel, it has a protective oxide layer that can cause major issues, and it loves to pull heat away from where you need it most. Taking a few extra minutes to get the metal ready will save you from the frustration of a weak, contaminated weld. The process is straightforward, involving a two-step cleaning method and, for thicker pieces, a bit of preheating. Mastering this prep work is the first real step toward producing professional-quality TIG welds that look great and hold strong. It’s a non-negotiable part of the process, so let’s walk through exactly what you need to do.
Step 1: Degrease the Surface
Before you even think about striking an arc, you need to get the aluminum surface completely clean. Any oils, grease, paint, or even fingerprints can introduce contaminants into the weld puddle, leading to porosity and a weak joint. Start by wiping the metal down with a degreaser or a solvent like acetone on a clean, lint-free cloth. Always perform this step first, because trying to brush a greasy surface will only embed the contaminants deeper into the metal. Make sure you wipe the area thoroughly, including a few inches around the joint. This initial cleaning ensures that you’re starting with a pure surface before you tackle the next, more stubborn layer.
Step 2: Brush Away the Oxide Layer
Aluminum naturally forms a thin, invisible layer of aluminum oxide on its surface. While this layer protects the metal from corrosion, it’s a huge problem for welding because its melting point is more than double that of the aluminum itself. You have to remove it. The best tool for this is a stainless steel wire brush. It’s crucial to use a brush that is only used for aluminum. Brushing right before you weld is key, as the oxide layer begins to reform almost immediately. Brush in a single direction to help lift the oxide off the surface instead of grinding it back in.
Why You Need Aluminum-Only Tools
Keeping your aluminum workspace separate is a rule you can’t afford to break. Using a wire brush, grinding disc, or file that has touched steel or any other metal will cause cross-contamination. Tiny particles of steel embedded in the aluminum will create a weak, brittle, and messy weld. To avoid this, you should maintain a set of tools dedicated exclusively to your aluminum projects. I recommend getting a separate stainless steel brush and labeling it "Aluminum Only" with a paint marker. This simple habit is one of the most effective ways to ensure your base metal is as pure as possible before you start welding.
When and How to Preheat Thicker Metal
Aluminum has very high thermal conductivity, meaning it pulls heat away from the weld zone incredibly fast. On thicker pieces (anything over 1/8 inch), this can make it difficult to form a stable weld puddle without cranking your amperage up to excessive levels. This is where preheating comes in. Gently warming the metal to around 200°F helps counteract the rapid heat loss, allowing you to start a puddle more easily and maintain better control. You can use a propane torch or a heat gun, but be careful not to overheat the metal. A temperature-indicating crayon can help you hit the right mark without overdoing it.
Dial In Your Welder Settings for Aluminum
Getting your welder settings just right is probably the most important step for TIG welding aluminum. It can feel like you're sitting at the control panel of a spaceship at first, but each dial and button has a specific job. Once you understand what each setting does, you'll be able to fine-tune your machine for a clean, strong, and professional-looking weld. Think of it less like a complicated exam and more like finding the perfect recipe. You just need to know what the ingredients are.
We're going to walk through the five most critical settings for aluminum: the type of current, AC balance, AC frequency, amperage control, and your starting method. Getting these dialed in before you strike an arc will save you a ton of frustration and help you avoid common problems like a dirty weld puddle or burning straight through your workpiece. Let's get your machine ready.
Set Your Machine to AC (Here's Why)
First things first: switch your welder to the AC, or Alternating Current, setting. This is non-negotiable for aluminum. Aluminum is a reactive metal, and it instantly forms a tough, invisible layer of aluminum oxide when exposed to air. This oxide layer has a much higher melting point than the aluminum underneath it. If you try to weld without dealing with it, you'll just end up with a messy, weak bond.
This is where AC power becomes your best friend. An aluminum welding guide explains that alternating current rapidly switches between two phases: one for cleaning and one for penetration. The "cleaning" part of the cycle acts like a tiny sandblaster, breaking apart that stubborn oxide layer so you can weld the pure, clean metal below.
Find the Right AC Balance for Cleaning vs. Penetration
Now that you're on AC, you'll likely see a setting for "AC Balance" or "Cleaning." This lets you control how much time the machine spends in the cleaning phase versus the welding phase. It’s a trade-off. More cleaning action gives you a prettier weld but is harder on your tungsten, while less cleaning gives you deeper penetration but can leave your weld looking dirty.
A good starting point for most machines is around 70-75% penetration (also called Electrode Negative or EN). If you start welding and see little black specks floating in your weld puddle, that’s a sign you need more cleaning. You can adjust the balance to increase the cleaning effect (Electrode Positive or EP) until those specks disappear. Getting your aluminum TIG welding settings right is all about making small adjustments.
Adjust Your AC Frequency for a Stable Arc
Next up is AC Frequency, which is measured in hertz (Hz). This setting controls how tight and focused your arc is. Think of it like the nozzle on a garden hose. A higher frequency, somewhere between 120 and 250 Hz, creates a narrow, focused arc. This is perfect for precise work on thin materials or for getting into tight corners without overheating the surrounding metal.
On the other hand, a lower frequency, around 80 to 120 Hz, produces a wider, softer arc. This is more forgiving and works well for laying down beads on thicker pieces of aluminum where you need to cover more ground. For general-purpose welding, starting around 120 Hz is a great place to be.
Control Your Amperage with a Foot Pedal
Amperage controls the heat. For TIG welding aluminum, using a foot pedal to control your amps is a game-changer. Aluminum soaks up heat very quickly, so you need a good amount of power to get the puddle started. But once it gets going, you need to back off the power quickly to avoid melting a hole right through your project. A foot pedal gives you that instant, dynamic control.
A good rule of thumb is to set your machine to about 1 amp for every one-thousandth of an inch (0.001") of material thickness. So for 1/8-inch (0.125") aluminum, you’d set your machine's max amperage to around 125 amps. The foot pedal then lets you use that full range, from a gentle simmer to full power, as you weld.
Set Up Your High-Frequency Start
Finally, make sure your machine is set to "HF Start," or High-Frequency Start. This feature creates an arc across the gap between your tungsten electrode and the workpiece without you ever having to touch the metal. This is the cleanest way to begin a weld and is especially important for aluminum.
Some other processes use a "scratch start" method, but doing that with aluminum will instantly contaminate your tungsten and embed impurities into your weld. A high-frequency start ensures both your electrode and your base metal stay perfectly clean from the very beginning. It’s a simple setting that makes a huge difference in the final quality of your weld.
Master Key TIG Welding Techniques
With your aluminum clean and your welder dialed in, it’s time for the fun part: laying down a bead. TIG welding is a skill that relies heavily on muscle memory and hand-eye coordination. It’s a bit like learning to pat your head and rub your stomach at the same time, but with a lot more heat and light. Don’t worry, you’ll get the hang of it.
The key is to break the process down into individual movements. You’ll need to manage your torch angle, travel speed, filler rod, arc length, and heat input all at once. It sounds like a lot, but each technique builds on the last. Focus on mastering one element at a time, and soon they will combine into a smooth, fluid motion. The following techniques are the fundamental building blocks for creating strong, clean aluminum welds. Practice them on scrap pieces until they feel second nature. Remember, every expert welder started exactly where you are now, so be patient with yourself and focus on steady progress.
Perfect Your Torch Angle and Travel Speed
Your posture and how you hold the torch are the foundation of a good weld. For stability, rest the base of your hand on your welding table. Hold the TIG torch like a pencil, but with a slight backward tilt of about 5 to 15 degrees. This angle is crucial because it ensures the shielding gas properly covers the molten weld puddle, protecting it from contamination.
Keep the tungsten tip close to the metal, maintaining a distance roughly equal to the thickness of your tungsten. As you move, your travel speed should be just right, fast enough to avoid melting through the aluminum but slow enough to create a solid weld. A consistent speed results in a uniform bead. Practice moving the torch smoothly across a piece of scrap to find a rhythm that feels comfortable and produces a clean result.
Feed the Filler Rod: The "Dab and Move" Method
Adding filler metal is a two-handed job that requires a specific rhythm. While your torch hand moves steadily along the joint, your other hand will feed the filler rod. The goal is to use a "dab and move" technique. Gently dab the tip of the filler rod into the leading edge of the molten weld puddle, then quickly pull it back out. The heat of the puddle, not the arc itself, should melt the rod.
This motion creates the classic "stack of dimes" look that TIG welding is famous for. Each dab adds material and defines the shape of the bead. It’s important to keep the filler rod within the cloud of shielding gas even when you pull it back, as this prevents the hot tip from oxidizing. Developing this welding coordination takes practice, so start slow and focus on a consistent dabbing motion.
Keep a Short, Consistent Arc Length
The distance between your tungsten electrode and the workpiece is called the arc length, and for TIG welding aluminum, shorter is better. A long arc can become unstable, spread the heat out too much, and allow oxygen to contaminate your weld. This leads to a weak, porous, and messy result. A good rule of thumb is to keep the arc length equal to the diameter of your tungsten, or even slightly less.
Maintaining this tiny gap requires a very steady hand. As you add filler metal, the height of the weld puddle changes, so you’ll need to constantly adjust your torch height to maintain that short, consistent arc. If you see the arc wandering or hear it crackling loudly, you’re likely holding the torch too far away. Focus on keeping that gap tight for a focused, controlled, and clean weld.
Learn to Control the Weld Puddle
Aluminum heats up very quickly and can go from solid to a molten mess in an instant. Your main job is to watch and control the weld puddle. As you start welding, you’ll see a shiny, fluid puddle form under the arc. Your goal is to keep this puddle a consistent size and shape as you move along the joint. If it gets too wide, it might "wash out" or, even worse, burn a hole right through your material.
This is where your foot pedal becomes your best friend. As the aluminum gets hotter, you’ll need to ease off the amperage to reduce the heat input. Think of it like driving a car; you give it more gas to get going and then ease up to maintain a steady speed. Reading the puddle and adjusting your amperage accordingly is a dynamic skill that separates beginners from pros.
Push or Pull? The Answer for TIG Welding
If you have experience with other welding processes, you might be wondering if you should push or pull the torch. For TIG welding, the answer is simple and absolute: always push the torch. This means your torch will be angled slightly back, with the torch head leading the way down the weld joint.
Pushing the torch ensures that the flow of shielding gas is directed over the molten weld puddle, protecting it from the atmosphere until it solidifies. If you were to drag or pull the torch, you would be leaving the hot, vulnerable puddle exposed behind you, resulting in a contaminated and weak weld. This is a non-negotiable rule for TIG welding any metal, especially one as sensitive as aluminum. Always push the puddle forward for the cleanest and strongest results.
Common Problems When TIG Welding Aluminum
Working with aluminum can feel a little tricky at first, but don't get discouraged. Most of the hurdles you'll encounter are completely normal and have straightforward solutions. Once you learn to spot these common issues, you'll be able to correct your technique and get back to laying down clean, strong welds. Let's walk through some of the most frequent problems and how to handle them.
Managing the Pesky Oxide Layer
If your welds are looking dirty or you're struggling to get a puddle started, you're likely fighting the oxide layer. Aluminum instantly forms a tough, invisible "skin" of aluminum oxide when it's exposed to air. The problem is this oxide layer melts at a much higher temperature (around 3700°F) than the aluminum underneath (about 1200°F). If you don't get rid of it, you risk burning through your base metal while trying to melt the stubborn oxide on top. This is why proper cleaning is non-negotiable. Before you strike an arc, you must remove this layer with a dedicated stainless steel brush.
Avoiding Burn-Through and Warping
Aluminum is an expert at conducting heat, which means it heats up and cools down very quickly. This property is what makes heat control so critical. You need a good amount of amperage to get the weld puddle started, but if you maintain that high heat, you can easily burn a hole right through the metal, especially on thinner pieces. This is where a foot pedal becomes invaluable, allowing you to apply initial heat and then back off instantly. This rapid heating and cooling can also cause your material to warp. To prevent this, use plenty of tack welds to secure your workpiece and consider using clamps to hold everything flat as you go.
What to Do About Tungsten Contamination
Seeing little black specks floating in your weld puddle is a classic sign of tungsten contamination. This usually happens when you accidentally dip the tip of your tungsten electrode into the molten puddle or touch it with your filler rod. These black spots can also indicate that your shielding gas coverage is poor or that your base metal is still dirty. If you dip your tungsten, stop welding immediately. Continuing will only embed more impurities into your weld. Let the electrode cool, snip off the contaminated end, and regrind it to a clean point before you start again. It’s a frustrating but necessary step for a quality weld.
How to Add Filler Metal Consistently
Creating that beautiful "stack of dimes" look comes down to a consistent rhythm of adding filler metal. Many beginners move the torch too much, but the bead's shape actually comes from the way you add the rod. The key is a steady "dab-and-move" technique. You'll move the torch just far enough to melt a new puddle, quickly dab the filler rod into the leading edge of the puddle, and then pull it back out as you move the torch forward again. This TIG welding technique creates the distinct ripples. Try to keep the tip of your filler rod within the shielding gas envelope to prevent it from oxidizing between dabs.
Avoid These Beginner Mistakes
Learning to TIG weld aluminum can feel like one step forward, two steps back. But here’s a secret: most of the frustration comes from just a few common mistakes. Once you know what they are, you can sidestep them and start producing clean, strong welds much sooner. Think of these as the foundational habits that separate the pros from the novices.
Getting these details right is what ensures a metal seam is not just holding together, but is also durable and clean, whether it's for a custom fabrication project or detailed architectural work. Let’s walk through the four biggest hurdles for beginners and how you can clear them with ease.
Skipping the All-Important Cleaning Step
If you take away only one thing, let it be this: your aluminum must be spotlessly clean before you ever strike an arc. Aluminum instantly forms a tough, invisible layer of aluminum oxide on its surface. This oxide layer melts at a much higher temperature than the aluminum underneath, which can cause all sorts of problems. To get a good weld, you have to remove it.
Start by wiping the metal down with acetone or a similar degreaser to get rid of any oils or grime. Then, use a dedicated stainless steel wire brush (and I mean dedicated—only use it for aluminum) to scrub the area you plan to weld. This mechanical cleaning removes that stubborn oxide layer. Keeping a separate set of tools just for your aluminum work is a pro move that prevents cross-contamination from other metals like steel.
Using the Wrong Type of Filler Metal
Walking into a welding supply store can be overwhelming, especially when you see the wall of filler rods. For aluminum, you’ll most likely be choosing between two main types: 4043 and 5356. They might look similar, but they behave differently and are used for different applications. Choosing the right one is critical for the final strength and appearance of your weld.
Think of 4043 as the more forgiving, all-purpose choice. It contains silicon, which helps it flow smoothly into the joint and reduces the chances of cracking. It’s great for most general projects. The 5356 rod, on the other hand, contains magnesium, making it stronger and stiffer. It’s a better choice for projects that need more toughness and will be anodized after welding. As a beginner, starting with a 4043 rod is often a great way to build confidence.
Prepping Your Tungsten Incorrectly
If you’ve welded steel before, you were probably taught to grind your tungsten to a sharp, fine point. When it comes to TIG welding aluminum on AC, you need to forget that. For aluminum, you want a small, balled, or rounded tip on your tungsten. A sharp point on AC can become unstable, causing the arc to wander wildly and making it difficult to control your weld puddle.
You don’t want a giant ball on the end, just a slightly rounded tip. You can achieve this by briefly running the AC current on a piece of scrap copper or aluminum. The electricity will naturally round the tip for you. A properly prepared tungsten electrode gives you a more focused and stable arc, which is exactly what you need to lay down a precise bead on heat-sensitive aluminum.
Ignoring Your AC Balance and Frequency
Modern TIG welders give you incredible control over the arc, and two of the most important settings for aluminum are AC balance and frequency. The alternating current (AC) constantly switches between two phases: electrode positive (EP) for cleaning and electrode negative (EN) for penetration. The AC balance setting lets you control how much time the machine spends in each phase.
More cleaning action (EP) is great for blasting away oxides on dirty material, but it puts a lot of heat on your tungsten. More penetration (EN) directs the heat into your workpiece for a deeper weld. A good starting point is around 70-75% EN. AC frequency controls how quickly the current switches back and forth. A higher frequency creates a tighter, more focused arc, giving you better directional control. Don't be afraid to experiment with these settings on scrap metal to see how they affect the weld puddle.
Stay Safe While You Weld
Before you ever strike an arc, let's talk about safety. It’s easy to get excited about laying down that perfect stack of dimes, but none of it matters if you aren’t safe. TIG welding aluminum involves intense light, hazardous fumes, and serious electrical currents. Taking the right precautions isn't optional; it's a fundamental part of the skill. Getting your safety routine down from the very beginning will protect you from injury and allow you to focus completely on your craft. Think of your safety gear and practices as the most important tools in your entire shop. Once you build these habits, they become second nature, letting you weld with confidence and peace of mind.
Protect Your Skin and Eyes from Arc Flash
The light from a TIG arc is incredibly bright and emits powerful ultraviolet (UV) and infrared radiation, which can cause a painful "sunburn" on your eyes and skin called arc flash. To prevent this, you need a quality auto-darkening welding helmet set to the appropriate shade for your amperage. It protects your eyes and lets you see your work. Your skin needs protection, too. Always wear a long-sleeve, flame-resistant welding jacket and heavy leather gloves. Even a small amount of exposed skin can get burned in seconds. Covering up completely is one of the most critical welding safety hazards to avoid, so don't take any shortcuts here.
Ensure Proper Ventilation for Fumes
When you weld aluminum, the process creates fumes and gases that you should never breathe in. The cleaning action of the AC current vaporizes the aluminum oxide layer, releasing ozone and other particulates into the air. Proper ventilation is essential to keep your breathing zone clear and safe. At a minimum, work in an area with good airflow, like an open garage with fans positioned to pull fumes away from you, not past your face. For more consistent work, a local exhaust ventilation system or a fume extractor is an excellent investment in your long-term health. Following good welding safety practices for air quality is just as important as protecting your eyes.
Prevent Fire and Electrical Hazards in Your Workspace
Your welding area needs to be clear of any fire and electrical risks. The sparks and heat from welding can easily ignite flammable materials. Before you start, take a moment to scan your workspace. Move any paper, wood scraps, oily rags, or flammable liquids far away from your welding table. A clean, uncluttered floor also prevents tripping. You are also working with high amperage, so be mindful of electrical shock. Always inspect your cables and torch for damage, wear dry leather gloves, and make sure you aren't standing in water. These basic welding safety precautions create a much safer environment for you to work in.
How to Judge Your Weld Quality
After all that prep and practice, you’ve finally laid down a bead. So, how did you do? Learning to judge your own work is one of the most important skills you can develop. It’s not just about creating a weld that looks clean; it’s about ensuring the connection is strong, safe, and will stand the test of time. Much like a professional can spot the details of quality craftsmanship on a project, you can train your eye to see the difference between a great weld and a weak one.
Getting a feel for this takes time, so don’t get discouraged. Every welder, including the pros, started by learning how to spot common flaws. By knowing what to look for, you can diagnose issues with your technique or setup and make adjustments for the next pass. This feedback loop is how you’ll go from making sparks to creating strong, beautiful welds.
A Quick Visual Inspection Checklist
Your first line of defense is a simple visual check. Before you do any more complex weld quality testing, grab a good light and look closely at your bead. You’re searching for a few specific red flags that can tell you a lot about what happened during the weld.
Start by looking for any cracks, which are an immediate sign of a failed weld. Next, check for porosity, which looks like tiny pinholes or bubbles on the surface. This happens when gas gets trapped in the molten metal, creating a weak, spongy structure. Also, look for undercutting, a groove that forms at the edge of the weld where it meets the base metal. This thins out the material and creates a serious weak spot. Finally, make sure you have complete fusion, meaning the filler metal has fully bonded with the aluminum and isn’t just sitting on top.
How to Spot a Bad or Contaminated Weld
A good weld is clean and consistent, while a bad one often tells a story of contamination. If your weld looks sooty, discolored, or has excessive spatter around it, your metal likely wasn’t clean enough, or you had an issue with your shielding gas coverage. A proper visual inspection will also reveal the consistency of the bead itself. A lumpy or uneven bead signals a problem with your travel speed, heat input, or how you added the filler rod.
Beyond the surface, look for signs of inclusions. These are bits of foreign material, like tungsten from a contaminated electrode, trapped inside the weld. Like porosity, inclusions create internal weak points that can compromise the entire joint. A great weld should have a uniform, "stack of dimes" appearance, indicating consistent technique from start to finish.
Practice Drills to Build Your Skills
The secret to consistently good welds is muscle memory, and the only way to build it is through practice. Instead of just welding random scraps, focus on specific drills to improve your technique. Start with a simple bead on a plate. This drill helps you master your travel speed and arc length without worrying about a joint. Just focus on creating a straight, consistent bead.
Once you’re comfortable with that, move on to tack welding two pieces of metal together. This teaches you precise heat control to avoid warping the aluminum. From there, you can practice different joint configurations, like butt, lap, and corner joints. Each one presents a unique challenge and helps you get comfortable manipulating the torch and filler rod in different situations. Knowing what welding inspectors look for can give you a clear goal for your practice sessions.
Frequently Asked Questions
Why do I absolutely have to use AC for welding aluminum? Using Alternating Current (AC) is the secret to dealing with aluminum's tricky nature. Aluminum instantly forms a tough, invisible skin of oxide that melts at a much higher temperature than the metal itself. The AC setting on your welder creates a current that switches back and forth, providing a "cleaning" phase that blasts away this oxide layer, allowing you to weld the pure, clean metal underneath. Without it, you'd just be fighting a dirty, unworkable puddle.
My welds are coming out gray and sooty. What am I doing wrong? This is a classic sign of contamination, and it usually comes down to one of three things. First, double-check your prep work; the aluminum must be completely degreased and then brushed with a dedicated stainless steel brush right before you weld. Second, you might have an issue with your shielding gas. Make sure your argon is flowing correctly and consider using a gas lens for better coverage. Finally, you may need to adjust your welder's AC balance to provide a little more cleaning action.
I keep burning holes right through the aluminum. How do I stop that? This happens because aluminum soaks up heat incredibly fast. The key is to manage your heat input dynamically. A foot pedal is your best tool for this, as it lets you use high amperage to start the puddle quickly and then immediately back off the power to maintain control. If you're still burning through, try increasing your travel speed slightly. You want to move just fast enough to stay ahead of the heat and prevent it from building up in one spot.
Can I just use my steel wire brush on aluminum? Absolutely not. This is one of the most important rules to follow. Using a brush that has touched steel will embed tiny steel particles into the surface of your aluminum. When you try to weld it, this cross-contamination will create a weak, brittle, and messy weld that is guaranteed to fail. To prevent this, you must keep a separate set of tools, especially brushes and files, that are used only for your aluminum work.
What's the real difference between 4043 and 5356 filler rod, and which should I use? Think of 4043 as the more forgiving, beginner-friendly option. It contains silicon, which helps the weld puddle flow more smoothly and makes it less prone to cracking, so it's great for general projects. The 5356 rod contains magnesium, which results in a stronger and more ductile weld. It's a better choice for parts that need more structural toughness. When you're just starting out, I recommend grabbing a pack of 4043 to help you build confidence and get a feel for the process.