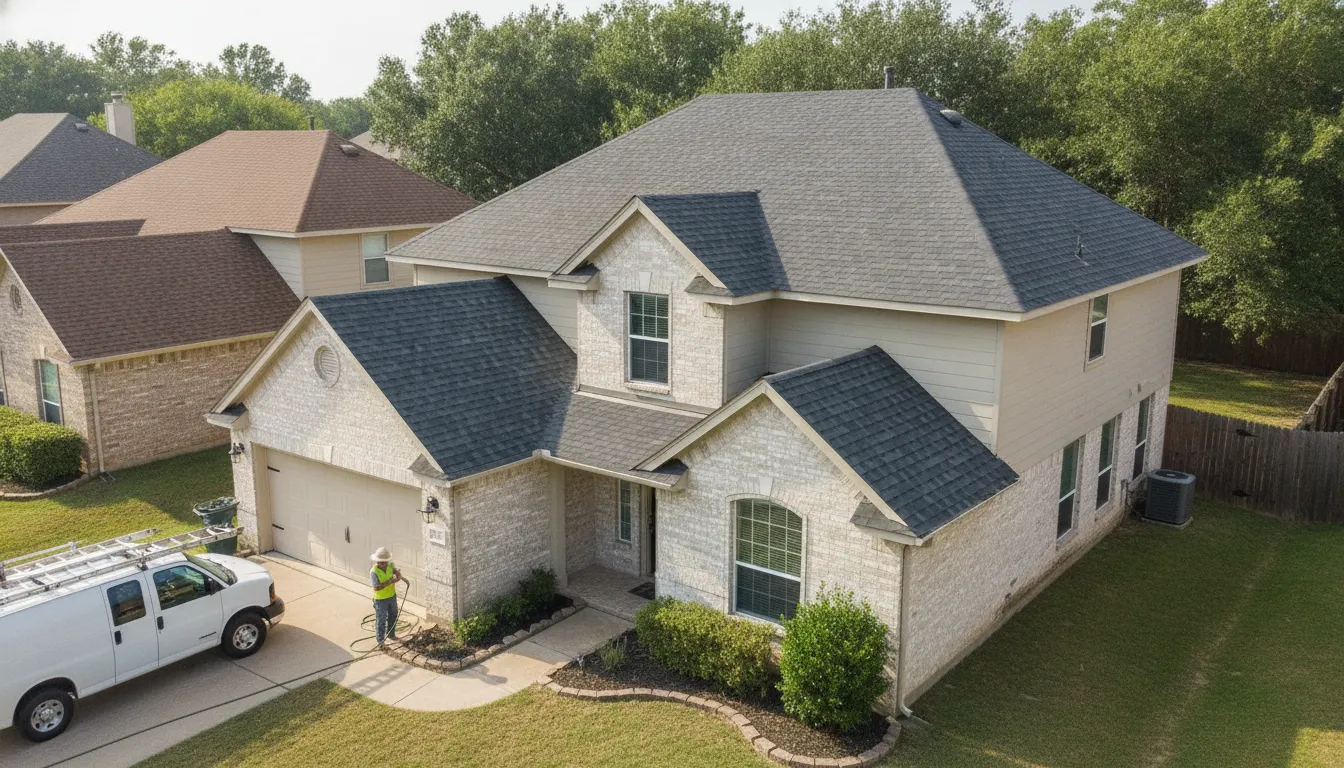
Tile roofing can be a strong fit for Houston and Austin homes, where intense heat, heavy rain, and seasonal storms test every part of a roof system. Its durability and long service life are valuable, but those benefits depend on more than choosing an attractive clay or concrete tile.
Call Elevation Roofing & Restoration at (832) 271-1726 for a free tile roof inspection and estimate.
Tile roof installation is a specialized process that combines roof preparation, moisture protection, secure tile placement, and careful finishing. A qualified roofer must evaluate the existing structure and install each layer for the home's design and local weather conditions.
The right approach starts beneath the visible tiles. Before material selection or color, homeowners should understand how the underlayment, battens, fasteners, flashing, and ridge details work together to protect the home. That foundation makes it easier to compare tile options and evaluate the installation process with confidence.
What Tile Roof Installation Involves
Tile roofing is a complete roof system, not simply a row of decorative pieces placed over a deck. The installation has to manage water, ventilation, weight, wind, and drainage as one coordinated assembly. That is why tile roof installation is a specialized process distinct from installing asphalt shingles. The exact materials and fastening methods should follow the tile manufacturer's instructions and applicable local requirements. The Tile Roofing Industry Alliance installation guides provide established guidance for concrete and clay tile projects.
The work begins with preparation. A roofing professional evaluates the existing roof, checks the deck for damage, and plans flashing, ventilation, valleys, penetrations, and edges before tile is placed. This planning matters in Houston and Austin, where a roof may need to handle intense sun, heavy rain, and periods of high wind. The roof deck also needs to be suitable for the selected tile system and its weight. A deck inspection can identify repairs that should be completed before installation continues.
Underlayment creates the primary moisture barrier
Tile sheds much of the water that reaches its surface, but the tile itself is not the only line of defense. High-quality underlayment installed beneath the tile acts as the primary moisture barrier for the home. It must be selected and installed correctly around valleys, walls, vents, chimneys, and other areas where water can collect or move beneath the tile. Proper ventilation is also an important part of the system, helping the roof assembly manage heat and moisture. The Building America Solution Center's tile roofing guidance identifies underlayment selection and ventilation as critical components of a successful installation.
Battens support the layout and tile placement
Depending on the roof design and selected system, battens may be installed over the prepared underlayment. These horizontal supports help establish consistent spacing and give the tiles a stable point of attachment. The installer then lays the tile according to the planned pattern, accounting for roof pitch, alignment, cuts, penetrations, and drainage. Concrete and clay tiles can differ in shape, weight, and installation requirements, so the process cannot be treated as interchangeable with shingle installation.
- Inspect and prepare the roof deck before covering it.
- Install the specified underlayment and address vulnerable water-shedding areas.
- Set battens or other supports when required by the system.
- Lay and fasten each tile using the appropriate method for the tile and deck.
- Complete flashing, ridge, hip, rake, and edge details for water resistance and finish.
Ridge and edge finishing protects the completed system
Ridge, hip, rake, and edge treatments complete the roof and contribute to both appearance and water resistance. These details require careful fitting because the edges are exposed to weather and often involve transitions between different materials. A final review should confirm that tiles are aligned, fasteners are appropriate, flashing is integrated, and ventilation openings remain functional. Installation timing can vary with roof size, design complexity, material availability, and weather exposure, so a contractor should explain the project sequence before work begins.
For a closer look at the material and installation options, visit Elevation Roofing's tile roofing service page. If you are considering a new system or have concerns about an existing roof, a professional roof inspection can help identify the right next step.
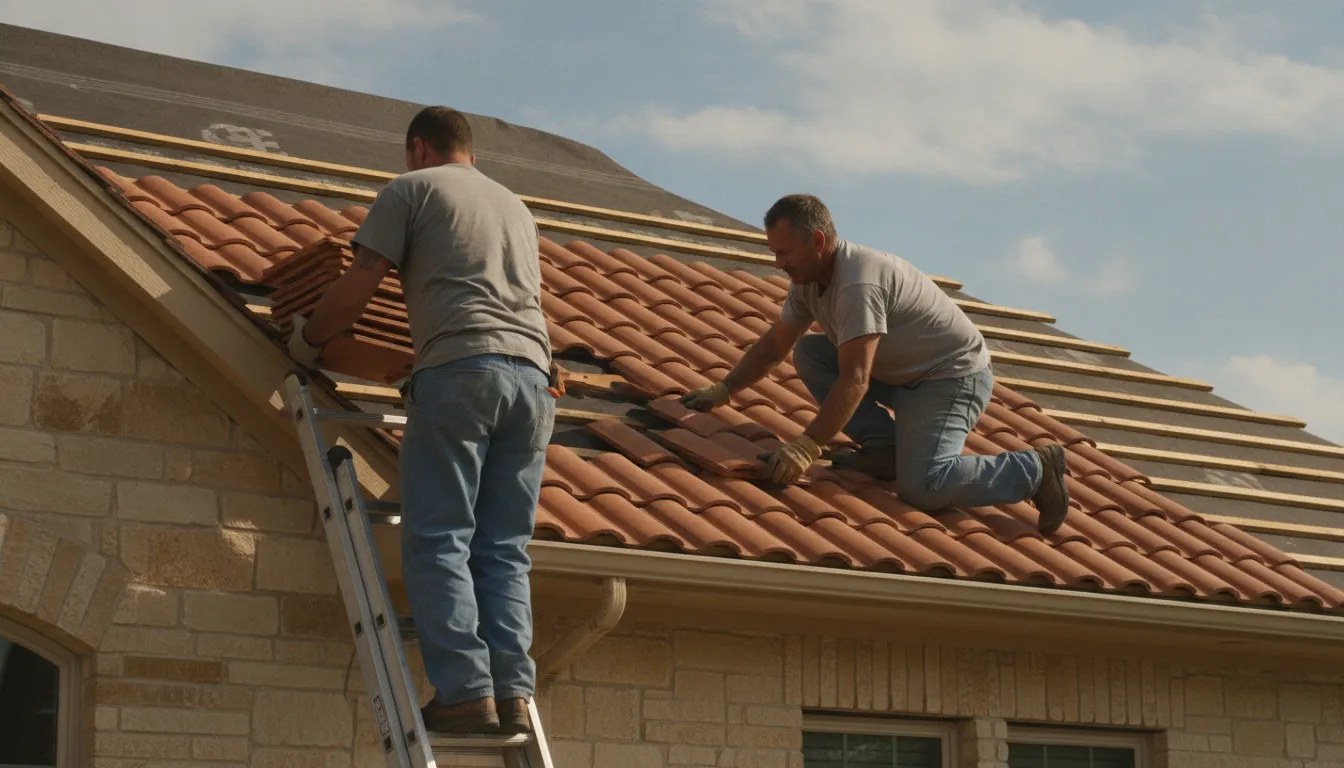
Clay vs. Concrete Tile: Which Is Right for Your Roof?
Clay and concrete are both durable tile roofing choices, but they are not interchangeable. The better fit depends on the existing roof structure, desired appearance, heat performance, project budget, and the installation details required for your home. The U.S. Department of Energy's Building America Solution Center identifies both clay and concrete as established tile roofing materials with different performance characteristics. Review the technical comparison before making a final selection.
| Factor | Clay tile | Concrete tile |
|---|---|---|
| Material characteristics | Fired clay with a long history in residential construction and strong weather resistance. | A molded cement-based material that can be produced in varied profiles, colors, and finishes. |
| Weight | Weight varies by profile and product. The roof deck must be evaluated before installation. | Often substantial in a complete roof system. The structure and deck must be checked for required capacity. |
| Longevity | Known for durability and long service life when correctly installed and maintained. | Also a durable option, with service life strongly influenced by installation quality and maintenance. |
| Cost | Material, profile, availability, labor, and roof complexity affect the final price. | Material and labor costs vary by product, roof design, structural preparation, and local conditions. |
| Energy and heat behavior | Color, profile, ventilation, and the complete roof assembly influence heat transfer. | Tile design and underside emissivity can affect heat entry. Research indicates that lower underside emissivity can reduce heat entering a building. |
| Aesthetic | Offers a distinctive traditional appearance with natural color variation and strong architectural character. | Offers broad options in color, shape, and finish, making it adaptable to many home styles. |
For Houston and Austin homeowners, neither material is automatically the winner. Clay can be appealing when the goal is a classic, weather-resistant look with a distinctive finish. Concrete may offer more flexibility in profiles and color selection, while its heat performance depends on the tile and the rest of the roof assembly. Roof tile color can influence heat conduction, which makes the choice especially relevant in a hot Texas climate. A lighter or otherwise heat-conscious design should still be evaluated alongside ventilation and underlayment, not treated as a stand-alone solution.
Storm exposure makes the installation system just as important as the tile itself. Both materials need a roof deck that can support the finished assembly, appropriate underlayment, and fastening methods suited to the tile, deck, and local conditions. A qualified contractor should also follow the applicable product installation instructions. In other words, the best material can underperform if the substrate, flashing, ventilation, or edge and ridge work is overlooked.
Before choosing between these options, compare the different types of roofs available for your home and discuss the structural requirements with a roofing professional. You can also review Elevation Roofing's tile roofing services to understand how a project is evaluated. Proper tile roof installation matters more than choosing clay over concrete, or concrete over clay. A careful inspection, sound preparation, correct fastening, and skilled workmanship are what turn either material into a dependable roof system.
What Does Tile Roof Installation Cost in Texas?
Tile roof installation is a significant investment, but the final amount depends on the roof system rather than the tile alone. Texas homeowners in Houston, Austin, and nearby communities should expect a professional estimate to account for the full scope of work. A simple roof with easy access may cost less than a steep, multi-level roof with several valleys, dormers, skylights, or complex edges. The expected schedule can also vary substantially with the roof's size and design complexity, so the contractor should explain both pricing and timing before work begins.
In general, tile roofing projects in Texas are commonly priced in broad ranges rather than one universal per-square-foot figure. Concrete tile is often a more accessible material choice, while clay tile may carry a higher material cost because of its manufacturing, appearance, and performance characteristics. Those general ranges are only a starting point. A trustworthy proposal should identify the materials, preparation, labor, and finishing details that make up the total.
Which factors have the greatest effect on the estimate?
- Roof size and layout: More roofing area requires more tile, underlayment, fasteners, labor, and disposal. Steep slopes and intricate designs also increase installation time.
- Tile material: Clay and concrete tile have different purchase prices, handling requirements, colors, profiles, and finish options. The right choice should fit the home's structure and the owner's goals.
- Deck preparation: Damaged or weakened decking may need repair or replacement before the new system is installed. Skipping this work can leave the finished roof resting on an unreliable base.
- Labor and access: Tile is a specialty roofing system that requires careful handling and installation. Difficult access, multiple roof elevations, and added safety requirements can affect labor costs.
- Flashing and edge details: Valleys, walls, chimneys, vents, ridges, and roof edges need properly planned flashing and finishing. These details help manage water and are not optional line-item extras.
Underlayment is another important part of the budget. Building America identifies quality underlayment as a primary moisture barrier in a concrete or clay tile roof system, while proper installation guidance also emphasizes ventilation and material-specific methods. See the tile installation guidance from the Building America Solution Center for technical background. A lower quote that omits appropriate underlayment, flashing, or deck preparation may not represent the same roof system as a more detailed proposal.
Can insurance or financing help with the cost?
If the project follows storm damage, documentation and claim handling can affect how much of the eligible work is covered. Elevation Roofing helps homeowners manage the insurance process from start to finish, including the paperwork involved in pursuing a claim. Coverage depends on the policy and the documented cause of damage, so homeowners should not assume that every replacement cost will be reimbursed.
Elevation offers a free roof inspection valued at $399, which can help identify the roof's condition and the work an estimate should include. Schedule an inspection through the roof inspection service before comparing proposals. For homeowners who need a payment option, financing of up to $25,000 through Wisetack may be available. Review the financing options for current terms and qualification details. The most useful estimate is one that clearly separates necessary repairs, selected materials, installation labor, and optional upgrades, giving you a practical basis for deciding how to proceed.
Structural Considerations for a Tile Roof in Houston and Austin
Tile adds substantial weight to a roof system, so a successful installation starts with the structure beneath the visible roofing. Before selecting clay or concrete tile, a qualified contractor should evaluate whether the roof deck, framing, and supporting components can carry the finished load. This is especially important when replacing asphalt shingles with tile, because the existing roof was not necessarily designed for the same material weight.
A professional roof inspection should identify damaged decking, moisture intrusion, sagging, inadequate framing, or other conditions that need attention before installation begins. The deck must be sound, properly prepared, and capable of supporting the planned tile system. Addressing those issues early helps prevent avoidable delays and protects the underlayment and tile above it.
How Does Tile Weight Affect the Roof Deck?
Concrete and clay tiles are durable materials, but durability does not remove the need for structural planning. The contractor should account for the selected tile profile, underlayment, battens, flashing, and other components as one complete system rather than judging the tile alone. If the deck or framing requires reinforcement, that work should be explained before materials arrive on site.
This evaluation also helps determine whether the project is a straightforward replacement or a more involved structural upgrade. A contractor should not cover questionable decking simply to keep the installation moving. The roof deck inspection findings, recommended repairs, and installation method should be part of the written project scope.
What Fastening and Ventilation Details Matter in Texas?
Houston and Austin roofs must be planned for heat, heavy rain, and periods of high wind. Tile should be secured with fasteners suited to the specific tile and roof deck, such as approved nails, screws, or clips. Correct fastening helps reduce the risk of slipping or movement during high-wind conditions. The right method depends on the product, roof design, exposure, and applicable installation instructions. So a contractor should follow the tile manufacturer's manual rather than rely on a one-size-fits-all approach.
Ventilation is another structural consideration. A properly designed ventilation system supports moisture management and helps the roof assembly perform in a hot Texas climate. Underlayment remains a critical moisture barrier beneath the tile, while ventilation helps manage air movement and conditions within the roof assembly. These components need to work together, not be treated as optional upgrades.
- Confirm the deck and framing can support the complete tile roof system.
- Repair deteriorated or moisture-damaged decking before covering it.
- Use manufacturer-approved fasteners and placement for the selected tile.
- Coordinate underlayment, flashing, and ventilation as one roof assembly.
- Plan daily work so unexpected weather does not leave the home exposed.
How Should Weather and Local Code Requirements Shape the Plan?
Tile roof installation is a multi-stage construction project. The exposed roof should be managed carefully if rain or severe weather interrupts removal, deck preparation, or underlayment work. A responsible crew plans the sequence, protects open areas, and communicates how weather may affect the schedule. Installation also needs to meet the requirements of the local municipality and the applicable Texas building code, including any provisions that affect fastening, ventilation, flashing, permits, or inspections.
Because code requirements and site conditions can vary, hiring a contractor experienced with Texas roofs is more than a convenience. The right professional can evaluate the structure, interpret manufacturer instructions, coordinate required inspections, and adapt the plan to the home. To discuss a properly scoped roof installation, start with an inspection and ask for a clear explanation of the structural and code considerations before work begins.
How Long Does a Tile Roof Last With the Right Maintenance?
A well-maintained tile roof can last approximately 50 to 100 years, making it one of the longer-lasting roofing options for Texas homes. Clay tile has a long history of use because of its durable, weather-resistant properties, while concrete tile offers its own balance of durability, appearance, and thermal performance. The material matters, but the roof system only reaches its potential when the installation, drainage, ventilation, and maintenance plan work together.
Tile is not maintenance-free. Houston humidity, intense sun, heavy rain, and seasonal storms can expose weak points over time. Austin roofs also face heat, wind, and changing weather conditions. Regular attention helps identify cracked or displaced tiles, deteriorated sealants, damaged flashing, blocked drainage paths, and underlayment concerns before a small issue becomes water intrusion or deck damage. For a practical maintenance checklist, review our guide to proper tile roof maintenance.
What affects a tile roof's lifespan?
The expected 50-to-100-year range is not a guarantee for every property. Lifespan depends on the quality of the original work, the condition of the roof deck, the tile selected, exposure to weather, and how promptly problems are addressed. A tile may remain intact while the underlayment or flashing beneath it needs attention. That is why an inspection should evaluate the complete roofing assembly rather than viewing the visible tile as the entire roof.
- Installation quality: Correct preparation, underlayment, ventilation, fastening, and edge details help the system manage moisture and movement.
- Weather exposure: Wind, rain, heat, and falling debris can damage individual tiles or expose vulnerable areas.
- Routine inspections: Finding cracked tiles, loose components, or aging flashing early can limit the scope of repairs.
- Roof access: Tile can be damaged by careless foot traffic, so inspections and service should use appropriate access practices.
- Maintenance timing: Prompt repairs help prevent localized damage from spreading into the underlayment or roof deck.
Why professional installation protects long-term performance
Tile roof installation is a specialized process, not simply the placement of decorative pieces over an existing roof. The work should follow the applicable manufacturer instructions and recognized industry guidance, including the concrete and clay tile installation manuals published by the Tile Roofing Industry Alliance. Manufacturer-specific requirements matter because installation details can vary by tile profile, roof design, deck material, fastening method, and exposure conditions.
Following those requirements also helps protect applicable manufacturer warranties. A warranty may depend on using approved materials, fasteners, underlayment, and installation methods. An experienced contractor can document the system, identify conditions that need correction, and install the roof in a way that aligns with the product requirements. Specialized training is especially important where high-wind conditions require careful fastening and detailing. The Building America guidance likewise identifies manufacturer-specific installation as important to maintaining warranties and achieving durable performance.
Professional installation cannot prevent every storm or eliminate the need for maintenance, but it gives the roof a sound starting point. During an evaluation, Elevation Roofing can inspect the visible tile and supporting components, discuss the property's condition. And recommend an appropriate maintenance or replacement plan for homeowners in Houston, Austin, and surrounding communities.
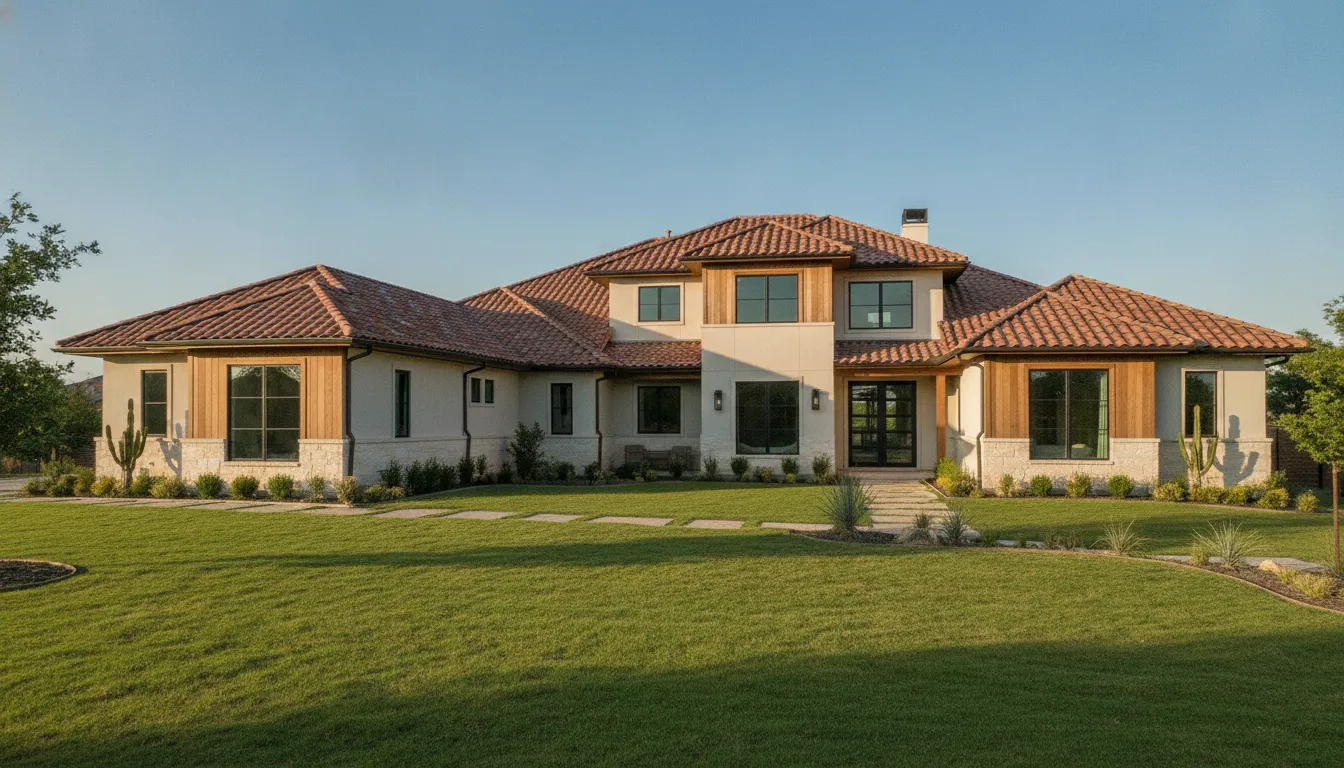
The Tile Roof Installation Process Step by Step
A tile roof is a complete roofing system, not simply a row of decorative coverings. A careful installation protects the roof deck, manages moisture, supports proper ventilation, and keeps each tile secure through changing Texas weather. The Tile Roofing Industry Alliance publishes concrete and clay tile installation manuals that help define sound installation practices for these materials.
The exact schedule depends on the roof's size, design complexity, material selection, and the condition of the existing deck. A professional roofing team should also follow the tile and underlayment manufacturer's requirements, local code, and project-specific engineering guidance.
- Complete the roof inspection and structural assessment. The project begins with an inspection of the existing roof, decking, framing, ventilation, flashing, and drainage. Tile can place substantial weight on a roof structure, so the contractor must confirm that the deck and supporting structure are suitable before materials are ordered. This is also the time to identify water damage, weak areas, or design details that could affect the installation plan. Learn more about professional roof installation and the planning involved.
- Remove the old roof and prepare the deck. If replacement is required, the existing roofing is removed so the deck can be inspected directly. Damaged or deteriorated decking is repaired or replaced, and the surface is cleared of debris. Starting with a sound, properly prepared deck gives the new system a stable base and helps prevent hidden moisture problems from being covered up.
- Install high-quality underlayment. Underlayment sits beneath the tile and serves as a primary moisture barrier. It must be selected and installed for the roof design, climate, and manufacturer's specifications. Careful work around valleys, penetrations, eaves, and other vulnerable areas is especially important. Proper ventilation and underlayment selection are both crucial parts of a successful tile roof installation, whether the project uses clay or concrete tile.
- Lay out the battens and tile pattern. Depending on the system, battens may be installed to support and position the tiles. The crew establishes courses, spacing, exposure, alignment, and locations for details such as valleys and roof penetrations. Accurate layout keeps the finished roof consistent and helps the system shed water as intended.
- Set and anchor each tile with the proper fastener. Tiles are placed according to the approved layout, then secured using fasteners designated for the specific tile and roof deck material. Depending on the system, those fasteners may include nails, screws, or clips. Proper anchoring is essential, particularly where wind exposure and roof geometry require additional attention. Installers should follow the applicable installation manual rather than relying on a one-size-fits-all method.
- Finish the flashing, ridge, and roof edges. Flashing is installed or completed around walls, chimneys, vents, valleys, and other transitions where water could enter. Ridge tiles, hip tiles, eaves, rakes, and edge details are then finished so the system has a clean, secure termination. These areas require precision because small gaps or poor transitions can undermine an otherwise well-laid roof.
- Perform the final inspection. Before the project is closed, the crew checks tile alignment, fasteners, flashing, penetrations, drainage paths, ventilation, ridge and edge finishes, and site cleanup. Elevation Roofing provides installation, inspection, maintenance, repair, replacement, and restoration services for residential and commercial roofing. The company also handles the insurance process from start to finish when storm damage is part of the project and backs its work with a 100% satisfaction guarantee. Homeowners can review the company's tile roofing services to discuss the right installation plan.
A properly documented final inspection gives the homeowner a clear record of what was installed and which maintenance steps will help protect the investment. It also provides an opportunity to ask questions about ventilation, cleaning, flashing, and future inspections before the roofing team leaves.
Schedule a free tile roof inspection and estimate with Elevation Roofing & Restoration today.
Frequently Asked Questions
How long does tile roof installation take?
The schedule depends on your roof's size, design complexity, material, deck condition, and weather. Your contractor should explain the expected timeline before work begins and update you if preparation or weather changes the plan.
What is the process for tile roof installation?
A professional installation typically includes a roof inspection, preparation, deck repairs if needed, underlayment, battens where specified, tile placement, flashing, and ridge or edge finishing. Underlayment is a primary moisture barrier, so material selection and installation details matter. See the Tile Roofing Industry Alliance installation guides for technical reference.
Can tile be installed over old shingles?
Not automatically. The existing roof usually needs to be evaluated and may need removal so the contractor can inspect the deck. Correct damage, install the required underlayment, and confirm the structure can support the tile system. A roof-by-roof assessment is safer than assuming an overlay is appropriate.
What type of tile should I use for my roof?
Clay and concrete are common choices, and each offers different weight, appearance, durability, and thermal characteristics. The right option depends on your home's structural capacity, roof design, budget, and performance goals. A qualified roofer can compare both materials for your Houston or Austin home.
Is tile roof installation suitable for Houston and Austin climates?
Tile can be a good fit for Texas homes when the roof deck, underlayment, ventilation, fastening plan, and drainage details are designed correctly. Because tile is heavy and Texas weather can include high winds, a contractor should verify structural capacity and use fasteners appropriate for the tile and roof deck.
Schedule Your Tile Roof Inspection
A professional inspection can clarify whether your home is ready for tile roofing and what the installation may require. Elevation Roofing & Restoration can review your roof, discuss practical next steps, and prepare an estimate for your Houston or Austin property.Call (832) 271-1726 to schedule a free roof inspection and estimate.